5 Key Shortcuts for Using Dynamic Panels
In Axure RP, the dynamic panel is a powerful and useful widget to have in your toolbox. Dynamic panels are containers with multiple states allowing you to prototype realistic functionality in no time. To become a pro when using dynamic panels, check out these 5 tips to help you prototype even more smoothly and efficiently.
1. Use the bracket keys to switch back and forth between panel states
Like with many apps and tools, keyboard shortcuts make things easier and help you save time. With dynamic panels, using the bracket keys ( [ and ] ) when you have the panel selected or when you’re in state-editing mode allows you to quickly switch back and forth between panel states so that you can view or edit other states with ease.
2. Use All States View to view and edit multiple states side-by-side
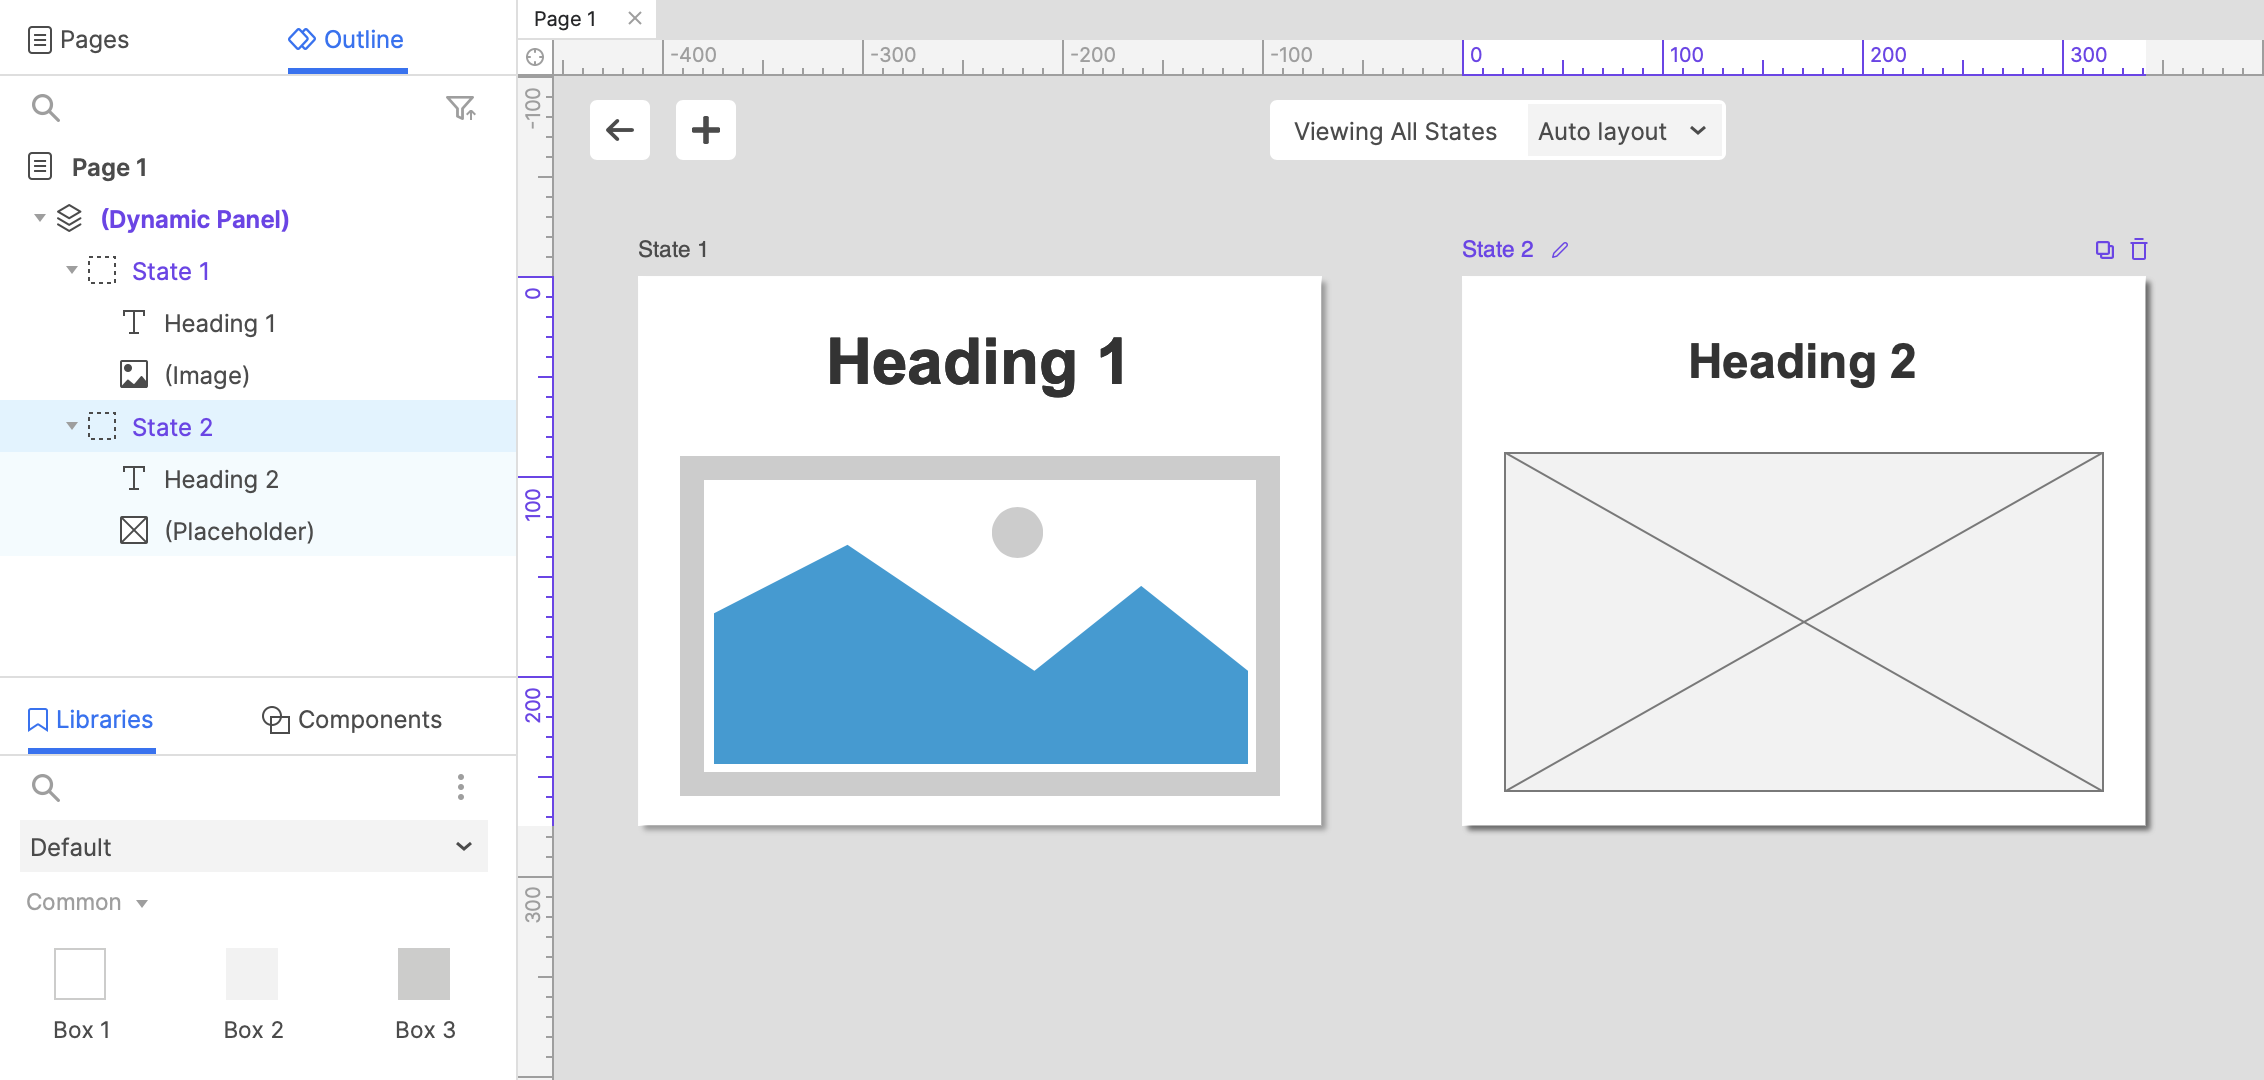
In All States View, you can add, remove, and edit widgets in any of the individual dynamic panel states. This makes it easy to make changes and edits in your dynamic panel states if you need to edit multiple states, or if you just want to view the context of all the states at the same time. When viewing all states, you can rearrange the layout to show all states vertically or horizontally and you can also reorder your panel states by dragging them.
Other convenient tasks you can do in this view includes the ability to create new panel states and duplicate existing states. Additionally, with the CMD+Option+drag (Mac)/CTRL+ALT+Drag (Windows) keyboard shortcut, you can easily drag widgets in and out of different panel states.

3. Copy and paste panel states in and out of different dynamic panels
If you want to copy a panel state from one dynamic panel to another, you can do so by using the CMD+C (Mac)/CTRL+C (Windows) keyboard shortcut. This comes in handy when you need to have multiple similar panels, or when you have different versions of a design idea and want to quickly copy and paste a panel state to another to make design changes for comparison. In addition to copying and pasting states, you can also break away a panel state by right-clicking the panel in the Outline pane and selecting “Break Away Current State” from the context menu.
4. Name your dynamic panels
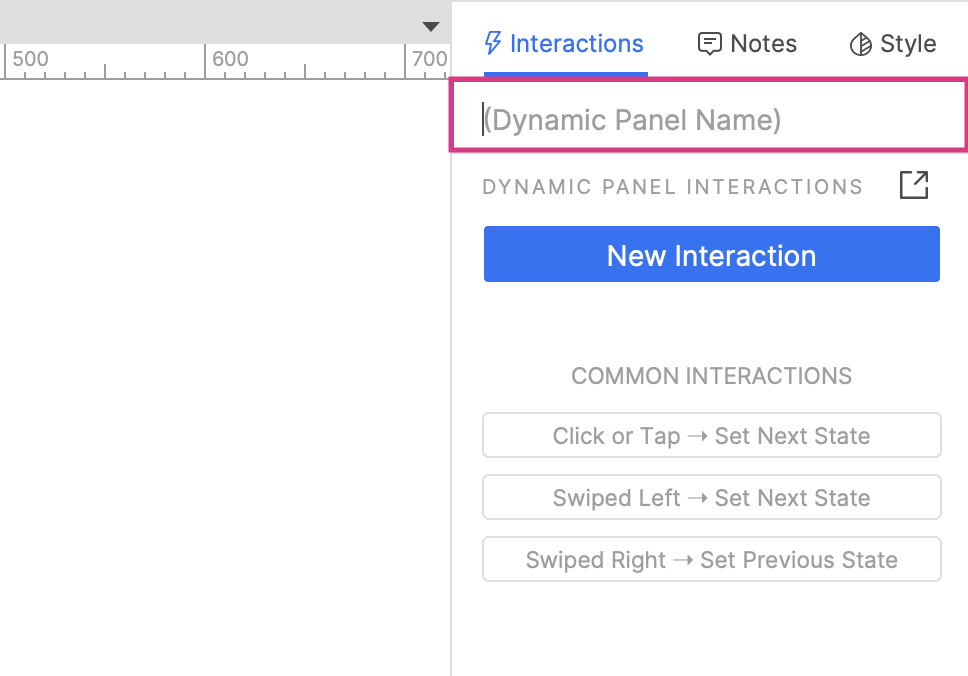
When creating your prototypes, the amount of widgets you have on a page can add up quickly, and keeping track of them can be a task in and of itself. If you have multiple dynamic panels on a page, naming them will help you to easily keep track of which one is which in the Outline pane and in the target dropdown menu when building interactions. Additionally, you can also give your panel states different names as well. To name your dynamic panels (or any widget) simply click on the widget name text field at the top of the Interactions pane or Style pane. To name panel states, you can do so in the Outline pane, or by clicking the state name in the panel bar or style toolbar.

5. Easily scroll to your current panel state in the interaction target dropdown list
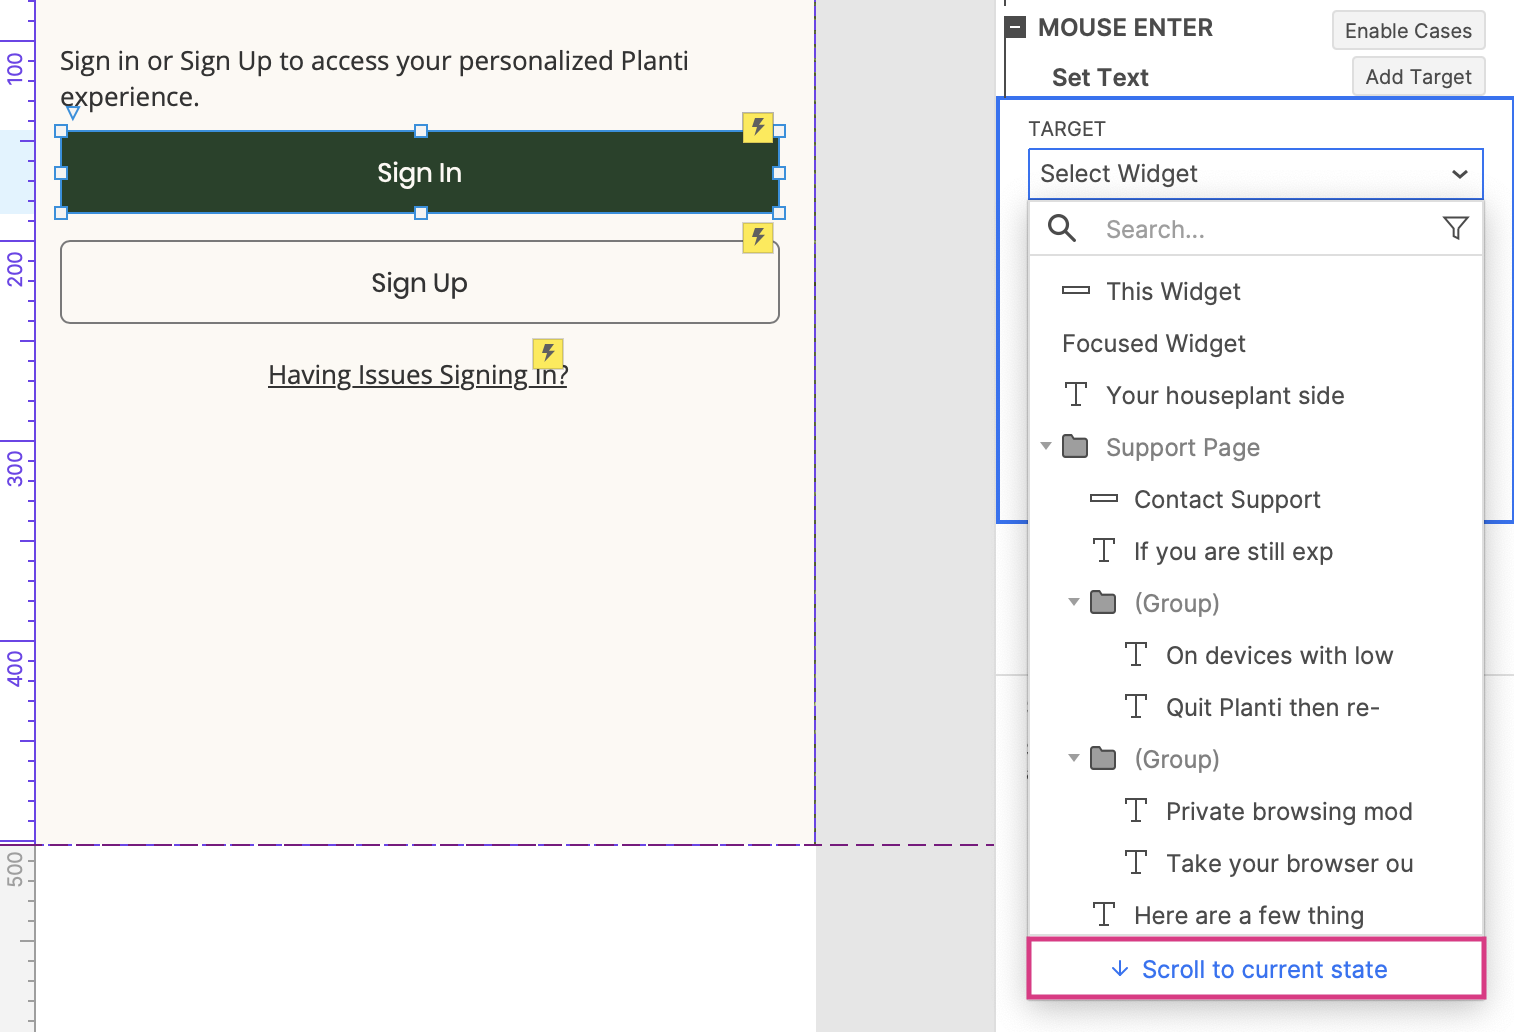
As your prototypes grow and as you have more dynamic panels and widgets on your pages, navigating through the target dropdown list when building an interaction becomes more challenging. However, in Axure RP 10, when adding interactions to a widget within a panel state, you can now scroll directly to that state in the target dropdown list by clicking the “Scroll to current state” button at the bottom of the list. This makes finding the right widget in the correct dynamic panel state a breeze and will ensure that you won’t mistake one panel state for another.

We hope these tips help you save time and become even more of a pro at using dynamic panels in Axure RP! For additional resources, check out our Dynamic Panels Core Training or our Tutorials. As always, if you need any help or want to submit feedback, you can contact us at support@axure.com. Happy Prototyping!


